
Creating pages
What are pages?
Pages allow for a variety of graphical layouts involving text and images. Pages let you easily create professional looking web content without technical expertise.
Creating a page
To create a page, you must first have a menu. If you don’t have a menu, the Menu page will teach you how to do that.
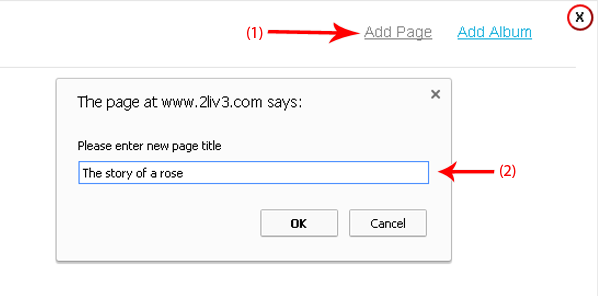
- Click the Add Page link
- Enter a name for the new page and click OK
Edit mode & the Sidebar
Once the page is created, it will automatically open in Edit mode. For pages that already exist, the Edit button can be used to enter edit mode
In Edit mode, the sidebar contains all the controls for changing the page. The various menus on the sidebar control different aspects of the page, and we’ll go through them one by one
For your convenience, the sidebar can be dragged around, or docked to the left or at the bottom of the screen
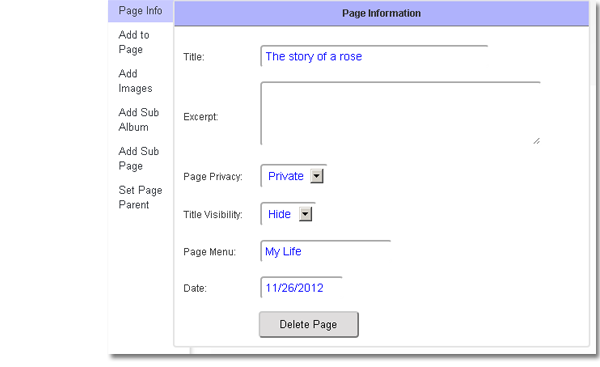
Page Info
The Page Info menu on the sidebar allows you to control various aspects of the page:
- Title – to change the title of the page and the link to the page
- Excerpt – the excerpt is important for search engines and other sites that link to your page. For example, the excerpt allows you to tell google what to show about your page in the google search result.
- Page Privacy – who can see your page. To allow anyone to see your page, you must change the privacy to Public
- Title Visibility – allows to display the page title on the top image. If the tile visibility is set to Show, you can drag the title to locate it in the appropriate location.
- Page Menu – the menu this page belongs to. If you type the name of a menu that already exists, the page will move to that menu. If you type the name of a menu that does not exist, the menu will automatically be created. If you move the last page from a menu, that menu will disappear.
- Date – the date the page is officially published at. You can back date or future date pages as needed.
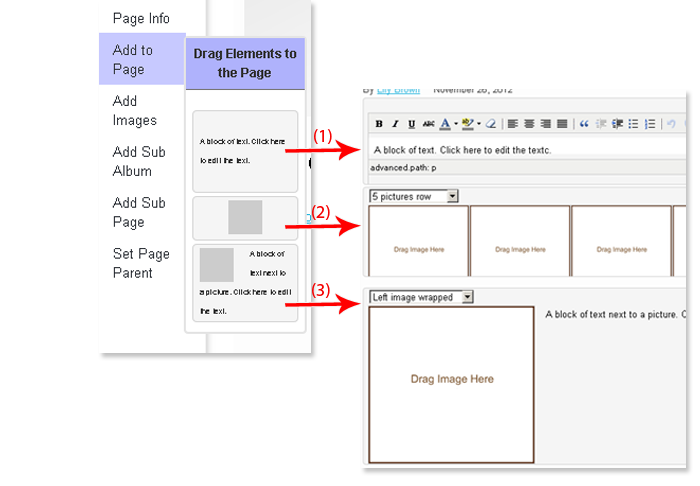
Page Elements
Pages are made of Elements. Each element can contain:
- Text only is an element that can contain only text. Once dragged into the page, click the element to type text in it.
- Images only is an element that can contain images. The combo box at the top left allows you to choose how many images will be displayed, and in what layout. Once the layout is chosen, you can drag uploaded images into the image boxes (more details later).
- Mix of text and images are elements that have an image next to a text box. The image can be to the left or to the right, and the text can be next to it or wrap around it. Select the desired layout in the combo box on the top left.
Once elements are in the page, they can be re-ordered by dragging them up or down.
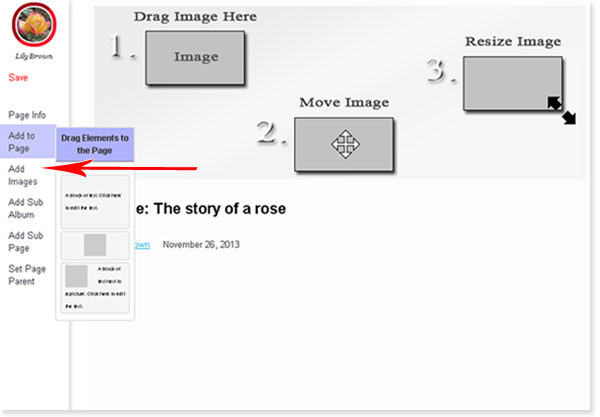
Adding images
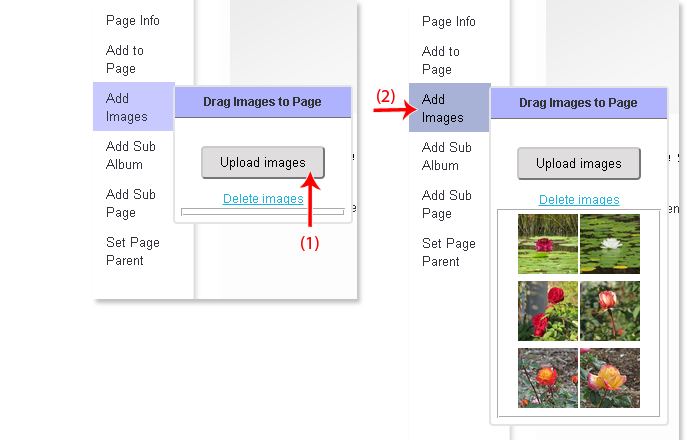
The Add Images menu has all the images that belong to the page and can be dragged into the various page elements.
- To use images in the page, the images must first be uploaded into the page. Click the Upload images button to upload images. When done, close the upload images box.
- When you reopen the Add Images menu, it will display the uploaded images. Drag the images into the image boxes on the page where you want to display them.
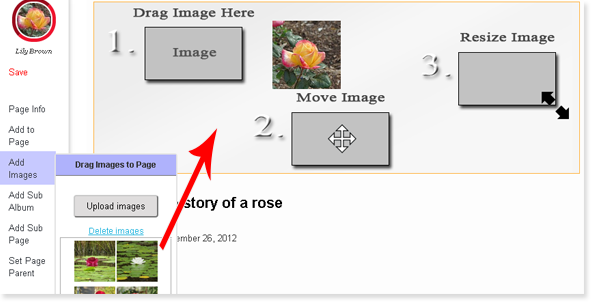
Top image
You can also drag images from the Add Images menu into the top image box. Once an image is in the top image box, you can move it by dragging it, or resize it by dragging the corner.
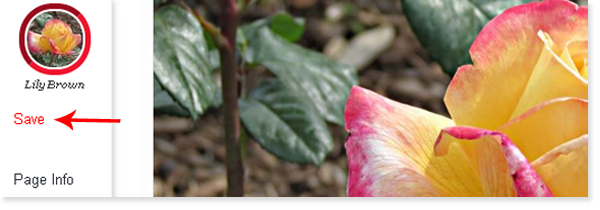
Saving
When you’re done editing the page, you must click the Save button to save your work. If you reload the page, close it, or navigate out of it without saving, all your changes will be lost.
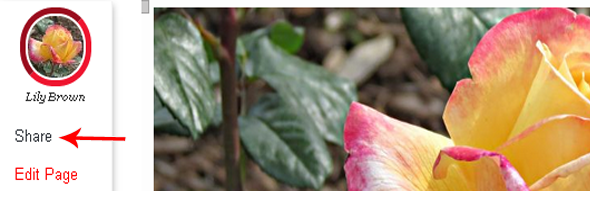
Sharing the page
When you’ve made your page public, you can also share it on your activity stream. Sharing your page on your activity stream will allow your friends to comment on it at the bottom of the page as well as on the activity stream.
Deleting
- Delete an Element – to delete a single element from the page, click the trash can icon. Keep in mind that any text in the element will be lost.
- Delete a Picture – to delete an image from the page, click the Delete Images link in the Add images menu. Make sure the image is not displayed in any element or as the top picture.
- Delete the whole Page – To delete the entire page, click the Delete Page button in the Page Info menu. Keep in mind that any text and images that are in the page will be lost.
