Creating picture albums
What are albums?
Albums are simple page layout for sharing a collection of pictures with short descriptions about those.
Creating an album
To create an album, you must first have a menu. If you don’t have a menu, the Menu page will teach you how to do that.
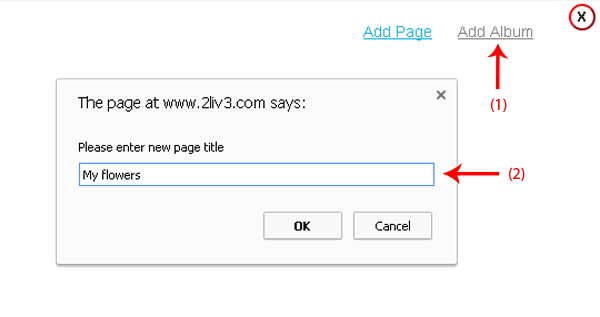
- Click the Add Album link
- Enter the name for the new album and click OK
Uploading pictures
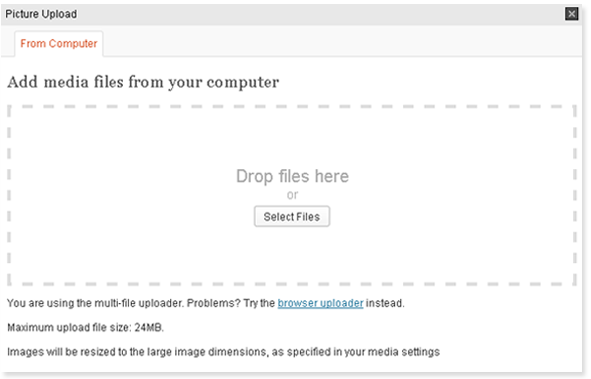
Once the album is created, it will open up the Picture Upload popup. To open it at other times, click the Upload Images button on the sidebar.
Drag images into the Drop Files Here window, or click the Select Files button.
Saving the album
To see the pictures you uploaded, you must first save the album by clicking the Save button on the sidebar.
Entering edit mode
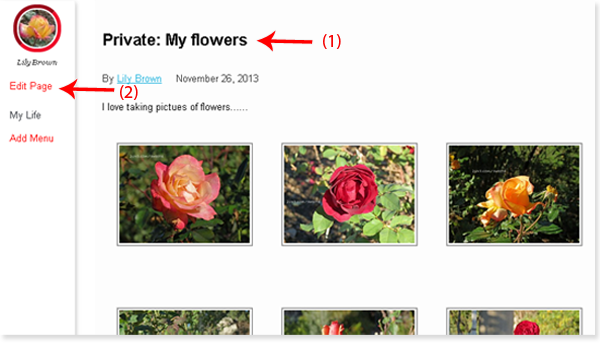
1. Notice that the album is created private. At this point you are the only one that can see it.
2. To change the album status, and make things nicer, you must first click the Edit button on the sidebar.
Editing the album
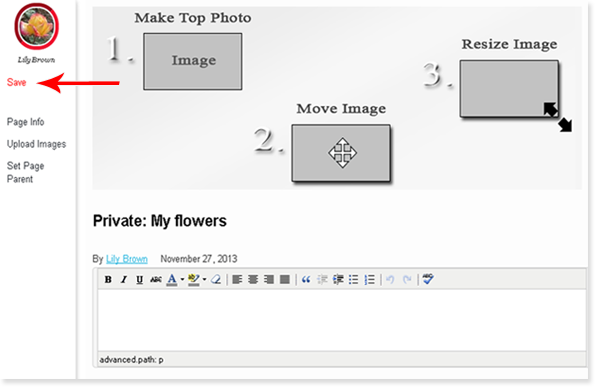
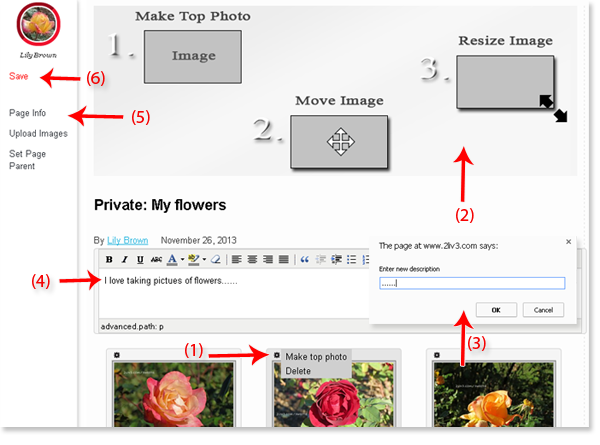
- Select one of the pictures to be the top picture. To do that, in the settings icon next to the picture, click the Make Top Picture button.
- The picture is going to show up in the top frame. Move it around by dragging it, or resize by dragging the corner.
- To enter a short description for some of the pictures, click the desired pictures, enter the description, and click the OK button.
- Write a description of the album at the top.
- Go to the Page Info menu on the sidebar and change the Page Privacy to Public
- Save the album
Sharing the album
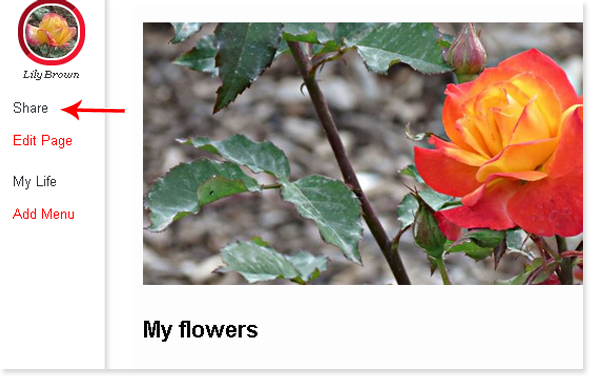
To share the album on your activity steam, click the Share button on the sidebar.
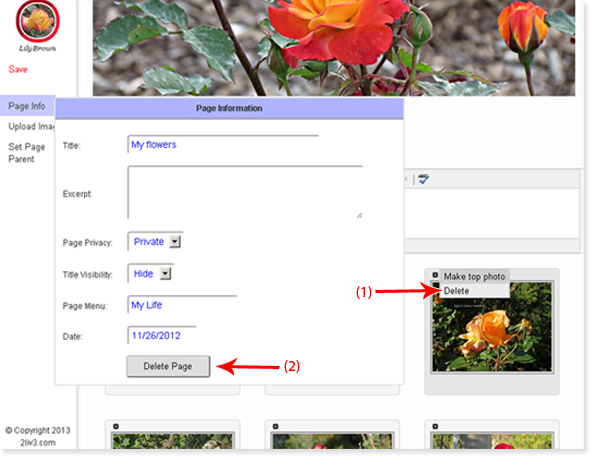
Deleting
You can delete a single picture or the entire album:
1. To delete a single picture, go to the settings icons next to the picture and click the Delete button. When done, click the Save button on the sidebar.
2. To delete the entire album, go to the Page Info menu on the sidebar and click the Delete Page button. Click OK to confirm that you want to delete the album.